Here’s some detail on my GIANT Lego mosaic of Yuna from Final Fantasy. Hopefully I’ll get to build her someday!
Starting Image
If you search around on the interwebs, you’ll find plenty of pictures of Yuna from Final Fantasy. I have 2 that are my favorites. This is the first. Yuna has a special place due to various things from college, mostly. She was featured in multiple games, YouTube videos, and other places that I remember fondly. I can’t think of a better character to make into a GIANT Lego image.
Image Pixelization
When most people pixelize an image, they use some automatic program that uses some regression algorithm to sort the picture into the various colors. This leaves the image looking really bad with random blocks of different colors and such. i.e. it gives a person chicken pocs. But, if you do it manually, it looks much better. You can control the various different image properties, edit things, and keep it from looking like a computer generated crap pile.
I like to put in the time and make each thing my own.
Before you start, be sure to decide how tall you want your creation to be. Remember, each pixel is the height of a Lego.
Final Image
Once the false color image is complete, it’s optional to run back through and put the actual colors back in the picture. This really isn’t necessary, but makes it significantly easier to build in MLCad. I always use MS Paint, but the new version makes it difficult. Paint XP is much eaiser to use for Pixel Art.
Importing to MLCad
The next step in the process is to import the image into MLCad. The process is quite extensive. MLCad does have an import feature, but it doesn’t work very well for this type of work. I always do mine manually, brick by brick.
Keep in mind, there are two ways to build a model. You can use all 1×1 bricks or use bricks of varous sizes. I’ve used both for different reasons. Some works require 1x1s to look right, especally the crap computer generated images, and some are cheaper to use 1x1s. Or, maybe, the bigger parts aren’t made in that color. However, in my experience, it’s cheaper to use the bigger bricks.
I always make the Lego logos on my bricks facing the same way, usually up. This gives you some funky brick positions, but adds that extra touch of detail that makes your creations really pop.
This image is a complete model of Yuna. I started it on 6/23/17 and finished it on 1/15/18. I only worked on it in my spare time, so I don’t really know how many man hours went into construction.
Yuna stands 9′-11.7″ tall (304 cm) and 7′-4.5″ wide (225 cm). Using the bigger bricks, she requires 16,293 pieces. Using 1×1 bricks, she requires 38,581 pieces.
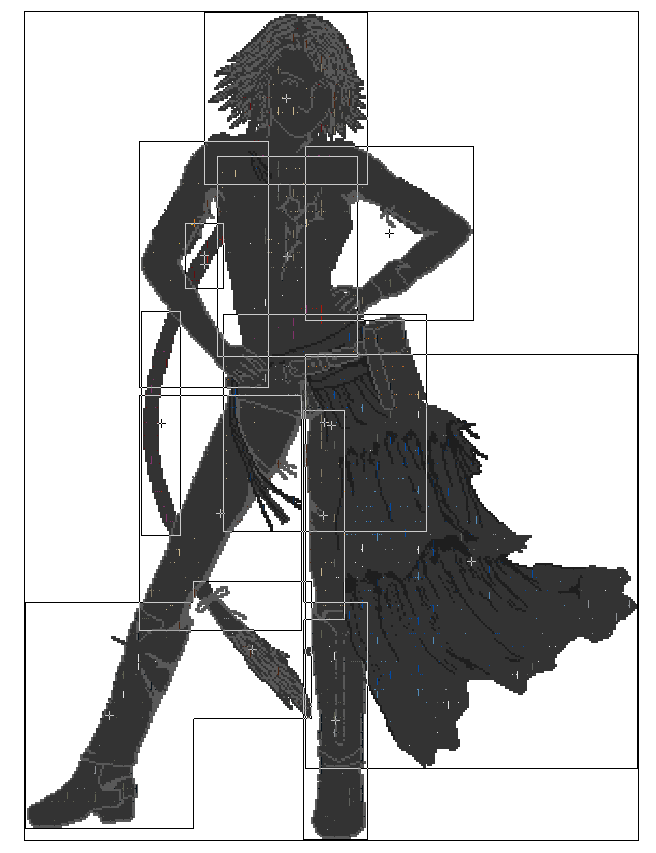
Submodels
My computer is pretty powerful, but even it has time when I get above a certain number of pieces in any given MLCad model. To avoid this issue, I used submodels to build Yuna. You can see the variou pieces shown here. The biggest is the skirt. When I got towards the end, my computer was really grinding with each additional brick.
Zoomed In
Here’s a zoomed in picture of her belt. This should give you an idea of what I’m talking about. Keep the Lego logos going the same way and use the bigger bricks to keep costs down.
Completed Model
Maybe some day!
The original stuff for this page was uploaded on 1/18/18. We’ll see how long it takes to build her.